RHEL 6 BASIC GRAPHICAL INSTALLATION

Installing RHEL6 with above specification
- Enter into BIOS setting and make CD/DVD Drive as first boot device
- Make sure that VT (Virtual Technology) is enabled for RHEL6-64 bit systems
- Insert the RHEL 6 CD/DVD into CD/DVD drive and boot the system
- If booted from CD/DVD Rom the following screen will be displayed

Move the cursor to Install or upgrade an existing system and press Enter

To test the media select OK, to skip the testing move cursor to Skip and press enter

Click on Next button to move forward

Select your desired language, usually English. Click Next to continue

Select the keyboard type as required usually U.S English, click Next to continue

Select the type of storage for the Computer. Click Next to continue

Assign a hostname to the system, if wish to give ip address click on Configure Network, else Click Next to continue
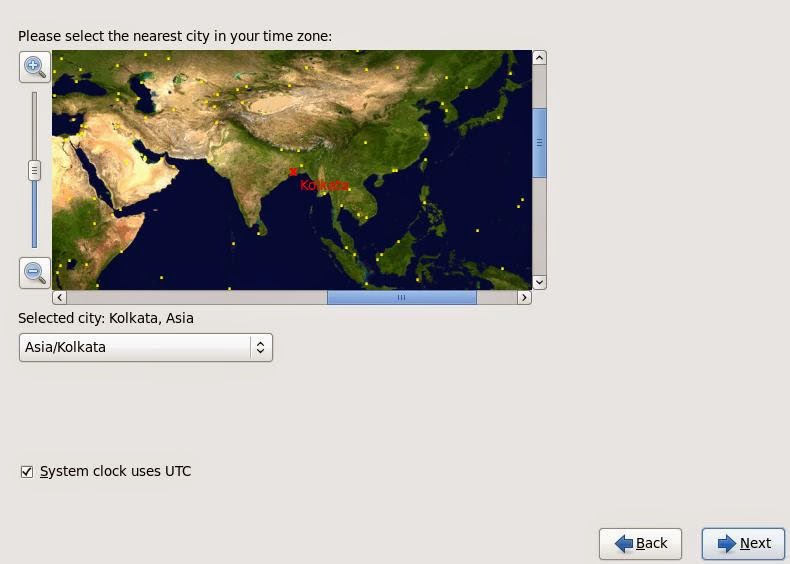
Select the nearest city in your Time Zone and Click on Next to continue

Assign some password for root, then click on Next to continue

Select the type of partitioning you want, to create your own partitions with custom sizes, select Create Custom Layout and click on Next to continue

Click on the Free space, then click on Create to create your own partitions

Check the box beside Standard Partition, Click on Create to continue.

Select / from Mount Point Box, give the size you wish for it and click on OK to create it.
Select the Free space again and click on Create to create another partition. Also Check the box beside Standard Partition, Click on Create to continue

Select /boot from Mount Point Box, give the size 200 MB for it and click on OK to create it.
Repeat the same steps and create swap space

Select /boot from Mount Point Box, give the size 200 MB for it and click on OK to create it.
Repeat the same steps and create swap space

This time select swap from File System Type, give the size required and click on OK

Verify the partition and click on Next to continue with it.

Click on Write changes to disk to continue, if wish make changes click on Go back.

To change the name of boot loader select Edit and assign new name to it.
To assign password to boot loader check the box beside Use boot loader password and assign a password to it.
To keep all as default, just click on Next button to continue.

Select Desktop to have a graphical environment in RHEL6.
Check Customize later to install additional software later. Click on Next to continue

Now sit back and relax until the installation is completed.

When above prompt is displayed, remove the CD/DVD from the drive and click on Reboot to reboot the system.

Click on Forward to move to next step.

Accept the license agreement and click on Forward to continue

Check No, I prefer to register at a later time. to skip the registration and click on Forward.

Click on No thanks, to move to next step

Click on Forward to continue.

Give a name to create a user and assign it a password. Click on Forward to continue.

Set the date and time and click on Forward to continue

Click on Finish and congratulation your installation is now completed.
Login using root user.
No comments:
Post a Comment